This tutorial works for shag hair as well for hair fx
first, create a sphere, and put a spherical uvw mapping.
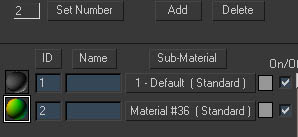
then apply a multi/subobject material with two materials, the first material with id #1 will have a gradient in its difuse slot (the default, black to white),
the second material with id#2 will have a gradient ramp in its difuse slot with diferents colors.see next pic.
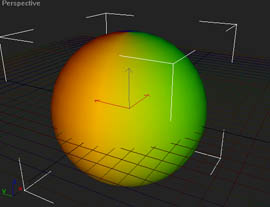
this is how our sphere will look
now, go to environment and apply a shag fur, to the entire sphere, and enable the geometry in the geometry tab (this will create the hairs at the render moment,
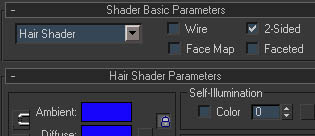
but will be 100% accurate), next apply a material to the fur, using the hair shader an double sided (some newer versions of the plugin
have better results without the double sided material, you can play to see wich is better) (see pic below)
then, in the parameters tab go to the lenght section and put this settings( make sure you check the submat id with the number 1)

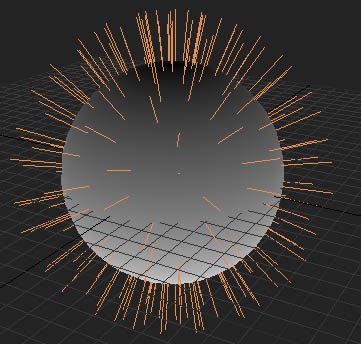
now our sphere will have the strands all over it, but the 1d difuse color will affect the lenght of the hairs like this : white=longest hair , black shortest hair.
viewport
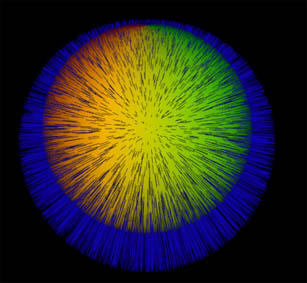
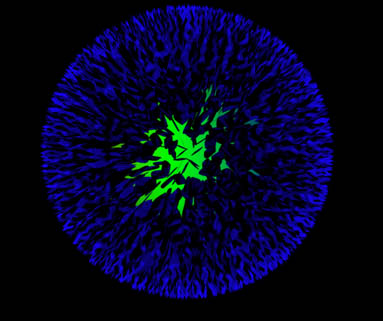
 rendered image
now you can use this not only to affect the lenght, but also the density, thicknes, curlines etc.
now, that we know how to control this parameters with a map, we can use our customized bitmaps if we want to instead of a gradient,
now uncheck the submat id in the lenght parameter to have the same length in all the strands.
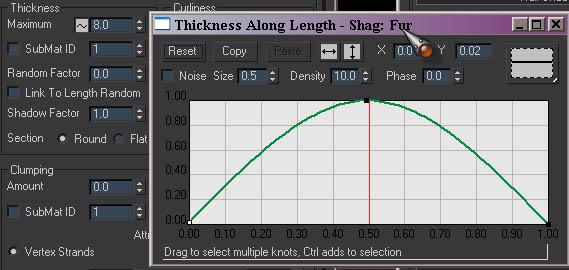
next, go to the thicknes tab, and click the button variable thicknes, put a value of 8 in the slot,
and finally right click the variable thicknes button and create a curve as shown in the picture
now go to the geometry tab, and put the settings as shown in the next pic

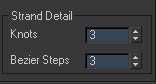
and go to the strand detail tab and do as show the picture below, this will speed up the render time
now click render to see what we have done so far. you will get this:
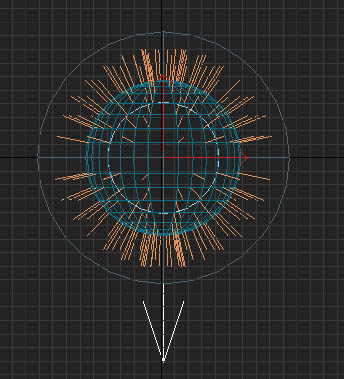
now we must make it look more natural, for that we will create a shag vector (placed in the helper tab)
and place it pointing down, play with the near and far range to make it look like the pic below
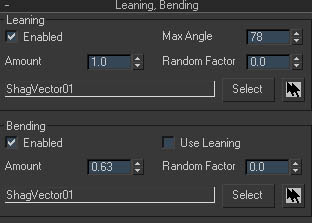
then go to the leaning and bending tab , and select the shag vector , put the setings as shown below
now we must orient the feathers so they will face the right direction, for that you can click the option "bend direction" in the orientation tab,
if you are using a version of shag hair earlier than 2.01.15 you will have to orientate the fur manual.
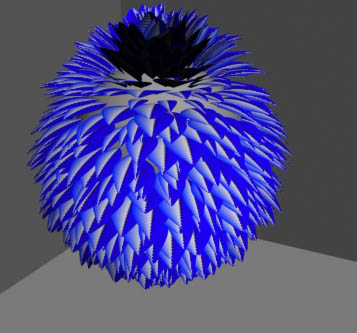
now, click render and and you will have something like this
here is the scene file, you can check it for more details shag-feathers.max